Travelpayouts is a digital partnership platform that brings together trusted brands, content creators, and travelers to make traveling a more rewarding experience for all.
Travelpayouts enable travel brands and content creators to grow through effective partnerships to transform the way people explore the world. a digital space where travel, experience, freedom, honesty, technology, and reward-driven creators and brands unite to benefit.
In this video we are going to create a whitelabel travel booking website with wordpress
How White Label Works
The White Label option gives your visitors a convenient way to plan their travel using your website, while seeing your brand name and your design. Recent developments offered by Jetradar and Hotellook allow effective searching for the best flight and hotel offers.
Create your own flight and hotel search engine in 10 minutes and start making profit right now!
[button color=”primary” size=”medium” link=”https://www.travelpayouts.com/?marker=380266″ icon=”” target=”true” nofollow=”false”]Sign Up for Free Now[/button]
How to set up White Label on the hosting
There are two ways to create White Label: setup on the primary domain or on the subdomain (it can be any level).
Pay attention: after you set up White Label on the hosting you should create it in the personal account.
Settings of White Label on the subdomain
For third-level domains (for example avia.your-site-name.com):
Create the CNAME record for the domain in the DNS settings on your hosting. The CNAME record should look like: “avia.your-site-name.com IN CNAME whitelabel.travelpayouts.com.” (“avia” is just an example, you can use your own domain name).
Hint for beginners: often in the DNS control panel you need to specify only the name of the subdomain, for example, avia. That is, the name of the main domain in the name field does not need to be entered. In any case, the system itself will notify you of an input error.
Important: The CNAME should be an entry in domain DNS-settings; you don’t need to create a subdomain for White Label on your hosting.
Examples of creating CNAME record in different control panels you can find here.
Please note that there’s a processing period (up to 72 hours) after creating your CNAME in domain settings.
Settings of White Label on the primary domain
For second-level domains (for example, your-site-name.com):
Set up a 301 redirect of the domain your-site-name.com to www.your-site-name.com. You can do it with help of hosting panel (don’t forget about redirect from https) or use htaccess file.
To do this in the root directory of your site you must create the file “.htaccess” with the following content (if the file already exists, simply add this entry to it):
RewriteEngine on
RewriteCond %{HTTP_HOST} ^[^.]+\.[^.]+$
RewriteCond %{HTTPS}s ^on(s)|
RewriteRule ^ http%1://www.%{HTTP_HOST}%{REQUEST_URI} [L,R=301]
Then set up forwarding from www.your-site-name.com to whitelabel.travelpayouts.com. Create CNAME record in the DNS settings of your hosting. The CNAME record should look like: “www.your-site-name.com IN CNAME whitelabel.travelpayouts.com.“.
Examples of creating CNAME record in different control panels you can find here.
There must be a period (up to 72 hours) after you created CNAME in domain settings and the White Label setup finished.
Important warning: a record like “*.your-domain.com IN A 192.168.0.1” (where the IP address of your website is specified instead of 192.168.0.1) may block the CNAME record. Read more about the operation of DNS here.
Note for experienced webmasters: you can configure A record for the master domain without using www and redirect. As a result, the White Label will open on the master domain (or any subdomain for which you will create an A record). The only restriction is that the IP address of the White Label, which is specified in the A record, may change. We do not inform you about the change of address anywhere, so you need to track it yourself.
Travel App – Ui/Ux Design for elementor Page Builder
Travel App - Ui/Ux Design
Send download link to:
How to add a logo image in the header
To add your logo to the header of White Label, open the tab Header in the White Label settings and paste the code <img src=“URL”> instead of code:
<span class=”TPWL-header-content-logo__img”></span>
where URL is a link to the file with your logo.
Note! The file must be available on the Internet from any computer, not only on your local drive.

How to add a favicon to White Label
To add a favicon to the White Label page, open the “Meta” section in the settings of White Label and post this string in the form:
<link rel = “shortcut icon” type = “image / x-icon” href = “PastHereLinkToFavicon”>
Repeat adding code for each page type (Home, Air issue, Hotel issue, Hotel page).
Note! The image should be available on the Internet, and not be only on your local computer.
How can I use an image for the header background
If you do not know what White Label is, check out the article What is Travelpayouts White Label.
This article will show you how to put your own image in the header of your White Label.
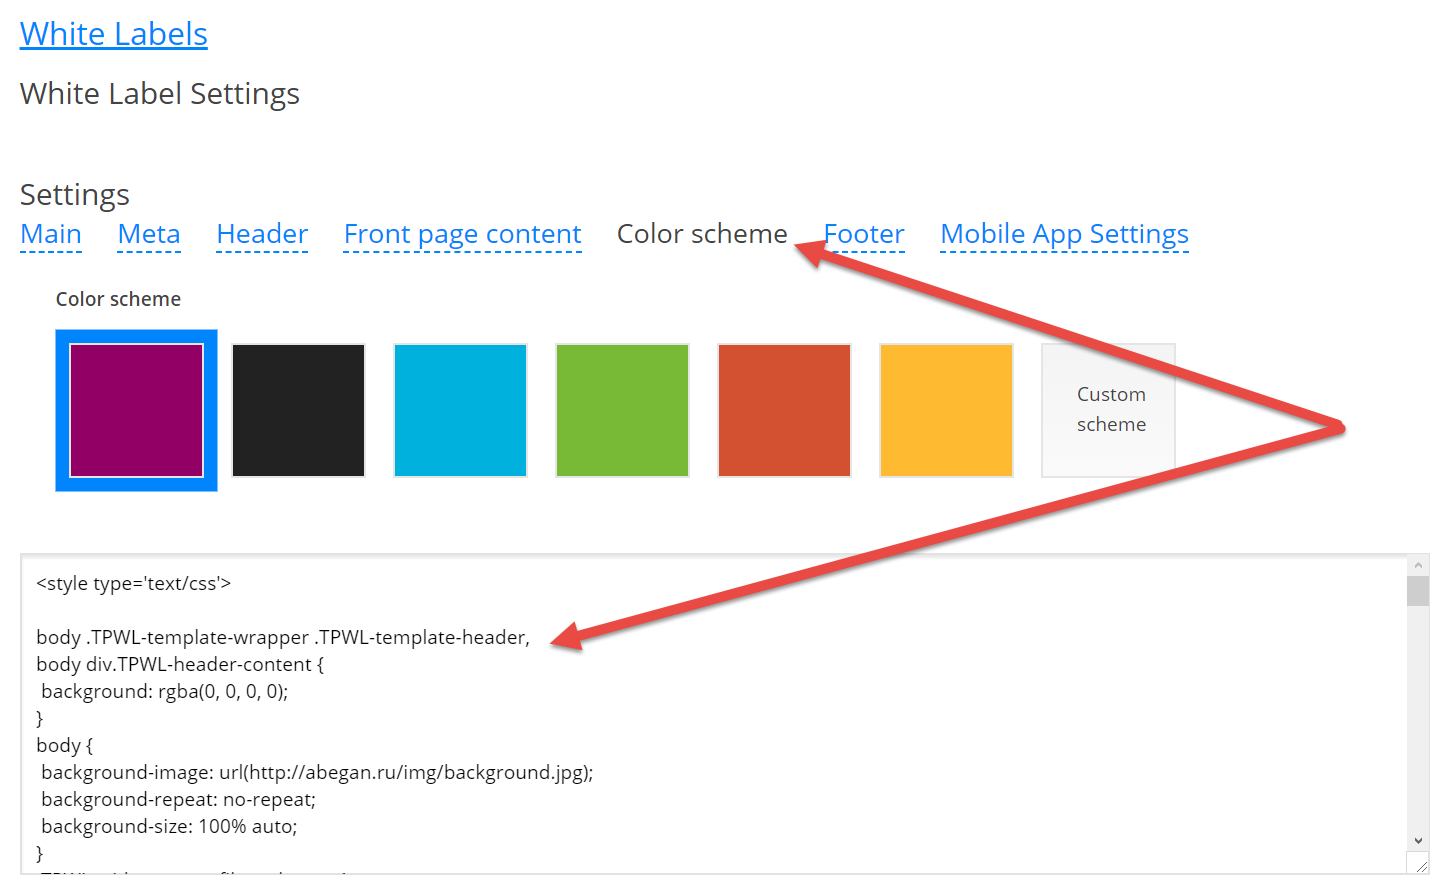
First, open the settings of the White Label tab Color scheme.

Then add the following code in the style settings of White Label:
body .TPWL-template-wrapper .TPWL-template-header,
body div.TPWL-header-content {
  background: rgba(0, 0, 0, 0);
}
body {
  background-image: url(https://cdn.travelpayouts.com/marketing/kit_travel/bg-slide-1.jpg);
  background-repeat: no-repeat;
  background-size: 100% auto;
}
.TPWL-widget--serp .filters_layout {
    background-color: #fff !important;
    border: 1px solid rgba(0, 0, 0, .12) !important;
    border-radius: 4px !important;
    padding: 10px !important;
}
.TPWL-widget .search_results-wrapper #tpwl-subscription {
    margin-bottom: 20px!important;
}
.TPWL-widget .filters .only-button {
    background: 0 0!important;
}
.TPWL-widget .filters_layout>main,
.TPWL-widget .slider_substrate::after {
    width: 200px!important;
}
.TPWL-widget .filters .right-text {
    background: none!important;
}
Link to the image that will be used as the background in brackets after the url.
Note! The image should be accessible from the internet and should not be on your local computer only.


