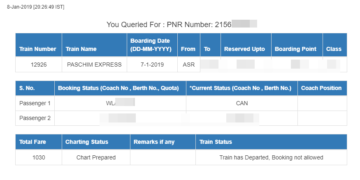
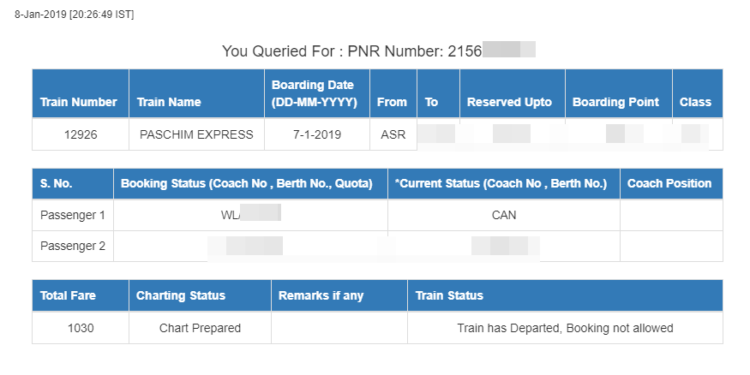
In this article, you’ll learn how to create a WordPress website that allows users to check the Indian Railways PNR (Passenger Name Record) status using the RapidAPI platform and the WPGetAPI plugin. This guide is perfect for anyone looking to integrate external APIs into their WordPress site without extensive coding.
Prerequisites
Before we start, ensure you have the following:
- A WordPress website installed and running.
- An account on RapidAPI.
- A RapidAPI key for the Indian Railways PNR status API.
- The WPGetAPI plugin installed and activated on your WordPress website.
Step 1: Obtain RapidAPI Key
- Go to the RapidAPI website, sign up, or log in if you already have an account.
- Search for the Indian Railways PNR status API in the RapidAPI marketplace.
- Subscribe to the API plan that suits your needs.
- Copy the API key provided after subscribing. You’ll need this key to configure the API request in WordPress.
Step 2: Install and Configure WPGetAPI Plugin
- Log in to your WordPress dashboard.
- Navigate to Plugins > Add New and search for the “WPGetAPI” plugin.
- Install and activate the plugin.
- After activation, go to WPGetAPI > Add New API in the WordPress dashboard.
- Enter a name for your API (e.g., “Indian Railways PNR”).
- In the Base URL field, enter the base URL provided by the Indian Railways PNR API on RapidAPI.
- Save your changes.
Step 3: Configure the API Endpoint
- Still in the WPGetAPI settings, click on the API you just created.
- Add a new endpoint by clicking Add Endpoint.
- Provide a name for the endpoint (e.g., “Check PNR Status”).
- In the Endpoint URL field, enter the specific endpoint for checking PNR status (e.g.,
/check-pnr). - Set the Method to
GET. - In the Headers section, add a new header with the key as
X-RapidAPI-Keyand the value as your RapidAPI key. - In the Query Parameters section, add a new parameter with the key as
pnrand leave the value blank (this will be filled in by the user). - Save your changes.
Step 1: Add CSS
.wpgetapi_html {
font-family: Arial, sans-serif;
margin: 20px;
width: 100%;
border-collapse: collapse;
}

.wpgetapi_html table {
width: 100%;
border: 1px solid #ddd;
margin-bottom: 20px;
border-collapse: collapse;
}

.wpgetapi_html th, .wpgetapi_html td {
border: 1px solid #ddd;
padding: 8px;
text-align: left;
}

.wpgetapi_html th {
background-color: #f2f2f2;
font-weight: bold;
}

.wpgetapi_html .header {
background-color: #0073aa;
color: white;
text-align: center;
padding: 10px 0;
}

.wpgetapi_html .header-title {
font-size: 24px;
font-weight: bold;
}

.wpgetapi_html .sub-header {
font-size: 18px;
font-weight: bold;
text-align: center;
margin: 10px 0;
}

.wpgetapi_html .info-table {
width: 100%;
margin-bottom: 20px;
}

.wpgetapi_html .info-table th {
background-color: #0073aa;
color: white;
text-align: center;
}

.wpgetapi_html .info-table td {
text-align: center;
}

.wpgetapi_html .passenger-table {
width: 100%;
margin-bottom: 20px;
}

.wpgetapi_html .passenger-table th {
background-color: #0073aa;
color: white;
}

.wpgetapi_html .fare-table {
width: 100%;
margin-bottom: 20px;
}

.wpgetapi_html .fare-table th {
background-color: #0073aa;
color: white;
text-align: center;
}

.wpgetapi_html .button-container {
text-align: center;
margin: 20px 0;
}

.wpgetapi_html .button {
background-color: #0073aa;
color: white;
padding: 10px 20px;
text-decoration: none;
border-radius: 5px;
margin: 0 10px;
}

.wpgetapi_trainName {
color: red;
font-weight: bold;
}
Below the form, add a shortcode that calls the WPGetAPI endpoint with the user-provided PNR number. You can use the following code to handle the form submission using JavaScript and display the result.Add JavaScript/jQuery on a custom js plugin
jQuery(document).ready(function($) {
// Create the new HTML structure
var newHtml = `
<div class="header">
<div class="header-title">Passenger Current Status Enquiry</div>
<div>${$(".wpgetapi_timeStamp").text()}</div>
</div>
<div class="sub-header">You Queried For : PNR Number: ${$(".wpgetapi_pnrNumber").text()}</div>
<table class="info-table">
<tr>
<th>Train Number</th>
<th>Train Name</th>
<th>Boarding Date (DD-MM-YYYY)</th>
<th>From</th>
<th>To</th>
<th>Reserved Upto</th>
<th>Boarding Point</th>
<th>Class</th>
</tr>
<tr>
<td>${$(".wpgetapi_trainNumber").text()}</td>
<td class="wpgetapi_trainName">${$(".wpgetapi_trainName").text()}</td>
<td>${$(".wpgetapi_dateOfJourney").text()}</td>
<td>${$(".wpgetapi_sourceStation").text()}</td>
<td>${$(".wpgetapi_destinationStation").text()}</td>
<td>${$(".wpgetapi_reservationUpto").text()}</td>
<td>${$(".wpgetapi_boardingPoint").text()}</td>
<td>${$(".wpgetapi_journeyClass").text()}</td>
</tr>
</table>
<table class="passenger-table">
<tr>
<th>S. No.</th>
<th>Booking Status (Coach No , Berth No., Quota)</th>
<th>*Current Status (Coach No , Berth No.)</th>
<th>Coach Position</th>
</tr>
</table>
<table class="fare-table">
<tr>
<th>Total Fare</th>
<th>Charting Status</th>
<th>Remarks if any</th>
</tr>
<tr>
<td>${$(".wpgetapi_bookingFare").text()}</td>
<td>${$(".wpgetapi_chartStatus").text()}</td>
<td></td>
</tr>
</table>
<div class="button-container">
<a href="#" class="button">Get Schedule</a>
<a href="#" class="button">Train Running Status</a>
</div>
`;

// Append new HTML structure
$(".wpgetapi_html").html(newHtml);

// Append passenger data to the passenger table
var passengerCount = $(".wpgetapi_numberOfpassenger").text();
for (var i = 1; i <= passengerCount; i++) {
var passengerHtml = `
<tr>
<td>Passenger ${i}</td>
<td>${$(".wpgetapi_bookingStatusDetails").eq(i-1).text()}</td>
<td>${$(".wpgetapi_currentStatus").eq(i-1).text()}</td>
<td>${$(".wpgetapi_passengerCoachPosition").eq(i-1).text()}</td>
</tr>
`;
$(".passenger-table").append(passengerHtml);
}
});
Pnr Status Plugin
Send download link to:
Introducing the Indian Railways PNR Status Plugin for WordPress
If you run a WordPress website and want to offer your users the ability to check their Indian Railways PNR (Passenger Name Record) status directly on your site, the Indian Railways PNR Status Plugin is the perfect solution. This plugin is designed to be simple, efficient, and user-friendly, allowing you to add a PNR status checker to any page or post using a shortcode.
Why Use the Indian Railways PNR Status Plugin?
Tracking the status of train reservations is a critical need for millions of travelers in India. With this plugin, you can provide a convenient way for your users to check their PNR status without leaving your website. It helps enhance user engagement, improves site traffic, and offers a valuable service to your visitors.
The plugin integrates seamlessly with the Indian Railways PNR API via RapidAPI, ensuring accurate and real-time updates on PNR status.
Key Features
- Simple Integration: The plugin uses a shortcode, making it easy to embed the PNR status checker on any page or post.
- Real-Time Status: The plugin fetches real-time data directly from the Indian Railways PNR API, providing your users with the latest information.
- User-Friendly Interface: The PNR status checker is designed to be intuitive and straightforward, ensuring a smooth experience for your users.
- Customizable: You can customize the appearance of the PNR status checker to match the design of your website.
How to Install and Use the Plugin
Step 1: Install the Plugin
- Log in to your WordPress dashboard.
- Navigate to Plugins > Add New.
- Search for “Indian Railways PNR Status Plugin”.
- Click on “Install Now” and then “Activate”.
Step 2: Configure the Plugin
- After activation, go to the plugin settings page by navigating to Settings > PNR Status.
- Enter your RapidAPI key to authenticate the plugin with the Indian Railways PNR API.
- Save your settings.
Step 3: Add the PNR Status Checker to Your Website
- To add the PNR status checker to a page or post, simply use the shortcode
[pnr_status]. - For example, if you want to add it to a new page:
- Go to Pages > Add New.
- Enter a title for the page (e.g., “Check PNR Status”).
- In the content area, insert the shortcode
[pnr_status]. - Publish the page.
The PNR status checker will now be live on your site, allowing users to enter their PNR number and get real-time updates.


